Today, comprehensive Service Network includes over 400 reefer refrigeration service and repair centers worldwide in all major and developing cities. Discover authorized locations on the Service Center Locator.”

The Authorised Service Partners network structure is designed to improve the cost of ownership for our customers by service partners that are highly trained in the maintenance and repair of Carrier container refrigeration units.”

Service Center Location

Programming your Reefer

A Reefer is designed for the storage and transportation of frozen goods, or products that need to be stored at a regulated temperature. 
Here is all the information you will need for programming our Offshore DNV and Intermodal ISO units.

ISO Reefer (Carrier Machinery)

On one of our ISO Reefer CCU’s, the keypad can be found on the right hand side of the control box door. Here you can find all the necessary controls to operate the Reefer, as well as the screens for viewing the internal temperature.

View the Operational Manual and Alarm Code list here​

Temperature

  • Ensure the unit is connected to the power supply.
  • Turn on the unit by placing the “ON/OFF” switch to the “ON” position.
  • Wait a few seconds for the unit to complete its “self-test”.
  • Set the temperature by using the “UP” or “DOWN” arrow keys, this temperature can be seen on the screen labelled “SETPOINT/Code”.
  • Press the “ENTER” key when you have reached the desired temperature between -35°C to +30°C.

Humidity

  • Press the “CODE SELECT” key.
  • Press the “DOWN” arrow key until “CD33” is displayed on the screen labelled “SETPOINT/Code”.
  • Press the “ENTER” key to select this function. The value on the right side of the display should begin to flash.
  • By pressing the “UP” or “DOWN” arrow keys, the humidity set-point is adjusted by 1%.
  • Press the “ENTER” key to confirm the desired humidity setting between 0% and 100%.
  • To indicate that the humidity control is active, the “SUPPLY” LED in the display will flash every second.

Ventilation

  • Loosen the centre wingnut.
  • Rotate the cover to select the desired ventilation setting.
  • Tighten the centre wingnut.
  • The ventilation setting may be displayed as a percentage, or as a CFM/CMH value, which mean cubic feet per minute or cubic meters per hour respectively.
  • The CFM/CMH value describes the volume of gas flowing into and out of the reefer in the specified time, with a larger value meaning a higher rate of ventilation. 

Defrosting

  • Press the “DEFROST INTERVAL” key.
  • Check the current interval setting on the display, it will show a value in hours.
  • Change the defrost interval by pressing the “UP” or “DOWN” arrow keys (3, 6, 12 or 24 hours).
  • Select the desired defrost interval by pressing the “ENTER” key.
  • Turn off the unit by pressing the “ON/OFF” switch.

DNV Reefer (Daikin Machinery)

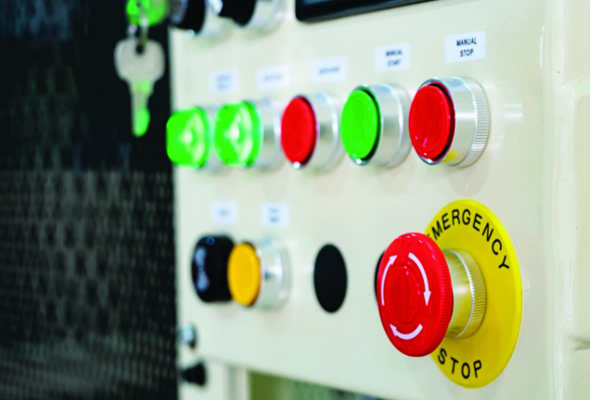
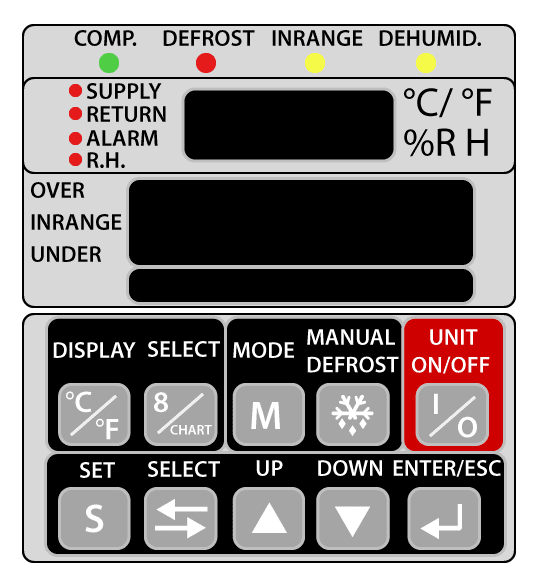
On one of our DNV Reefer CCU’s, the keypad and screens can be found on the left hand side of the back panel, where all the machinery is located. Here are all the necessary controls to operate the reefer, as well as the screens for viewing the internal temperature.

View the Operational Manual and Alarm Code list here​

Temperature

 
  • Ensure the unit is connected to the power supply.
  • Turn on the unit by pressing the “UNIT ON/OFF” button.
  • Wait a few seconds for the unit to complete its “self-test”.
  • Press the “SET” (S) key once.
  • The “SET-SPC” LCD screen will blink.
  • Set the required temperature with the “UP” and “DOWN” arrow keys between the range of -35°C and +30°C.
  • Confirm the temperature by pressing the “ENTER” key.
 

Humidity

  • Press the “MODE” (M) key three times until the LCD display shows “dHU”.
  • Use the “UP” or “DOWN” arrow keys to change the value in the display to “ON”.
  • Press the “ENTER” key to accept the new settings.
  • Press the “MODE” (M) key, the LCD should display “SET-SHU”
  • Use the “UP” or “DOWN” arrow keys to adjust the humidity setting between 0% and 100%.
  • Press the “ENTER” key to confirm the selected humidity setting.
  • Press the “ENTER” key to exit the mode operation menu.

Ventilation

  • Loosen the centre wingnut.
  • Rotate the cover to select the desired ventilation setting.
  • Tighten the centre wingnut.
  • The ventilation setting may be displayed as a percentage, or as a CFM/CMH value, which mean cubic feet per minute or cubic meters per hour respectively.
  • The CFM/CMH value describes the volume of gas flowing into and out of the container in the specified time, with a larger value meaning a higher rate of ventilation. 

Defrosting

  • Press the “SET” (S) key twice.
  • “SET-DEF” will blink on the LCD.
  • Use the “UP” and “DOWN” arrow keys to set the required defrost time (2, 6, 9, 12, 24 or 99 hours).
  • Confirm the selected defrost time using the “ENTER” key.